Contour
A gnarly wobble-bass synth where you draw the movement. Paint how each note's volume, pitch and tone change over time, loop the part you like, and push it through a drive section, fourteen filters and a full effects rack.
- Monophonic bass synth
- 2 oscillators (9 types) + sub, noise, sample
- 5 drawn envelopes
- 8-slot mod matrix
- 14 filter types
- 14 effects · 4 slots
- 8 macros
- XY performance pad
- AU · VST3 · Standalone
Quick start
Five minutes from install to wobble.
Load a preset
Use the arrows or the menu in the header. Wobble1–13, Speed Wobble and Talking Bass are good starting points.
Play low
Contour plays one note at a time; the last one wins. Hold a note to hear the loop of the volume envelope repeat.
Draw
Drag across the Volume envelope to draw a new shape. Try RANDOM for instant rhythms.
Sync it
Set the envelope's Sync to Note and its Rate to 1/1 so the wobble locks to your song's tempo.
Make it nasty
Switch on Overdrive or Fuzz in the Aggressor, pick the MS-20 or Diode filter, and route Mod 1 to the cutoff.
Save
Press SAVE in the header. Your preset joins the list, saved with every setting and every drawing.
The window
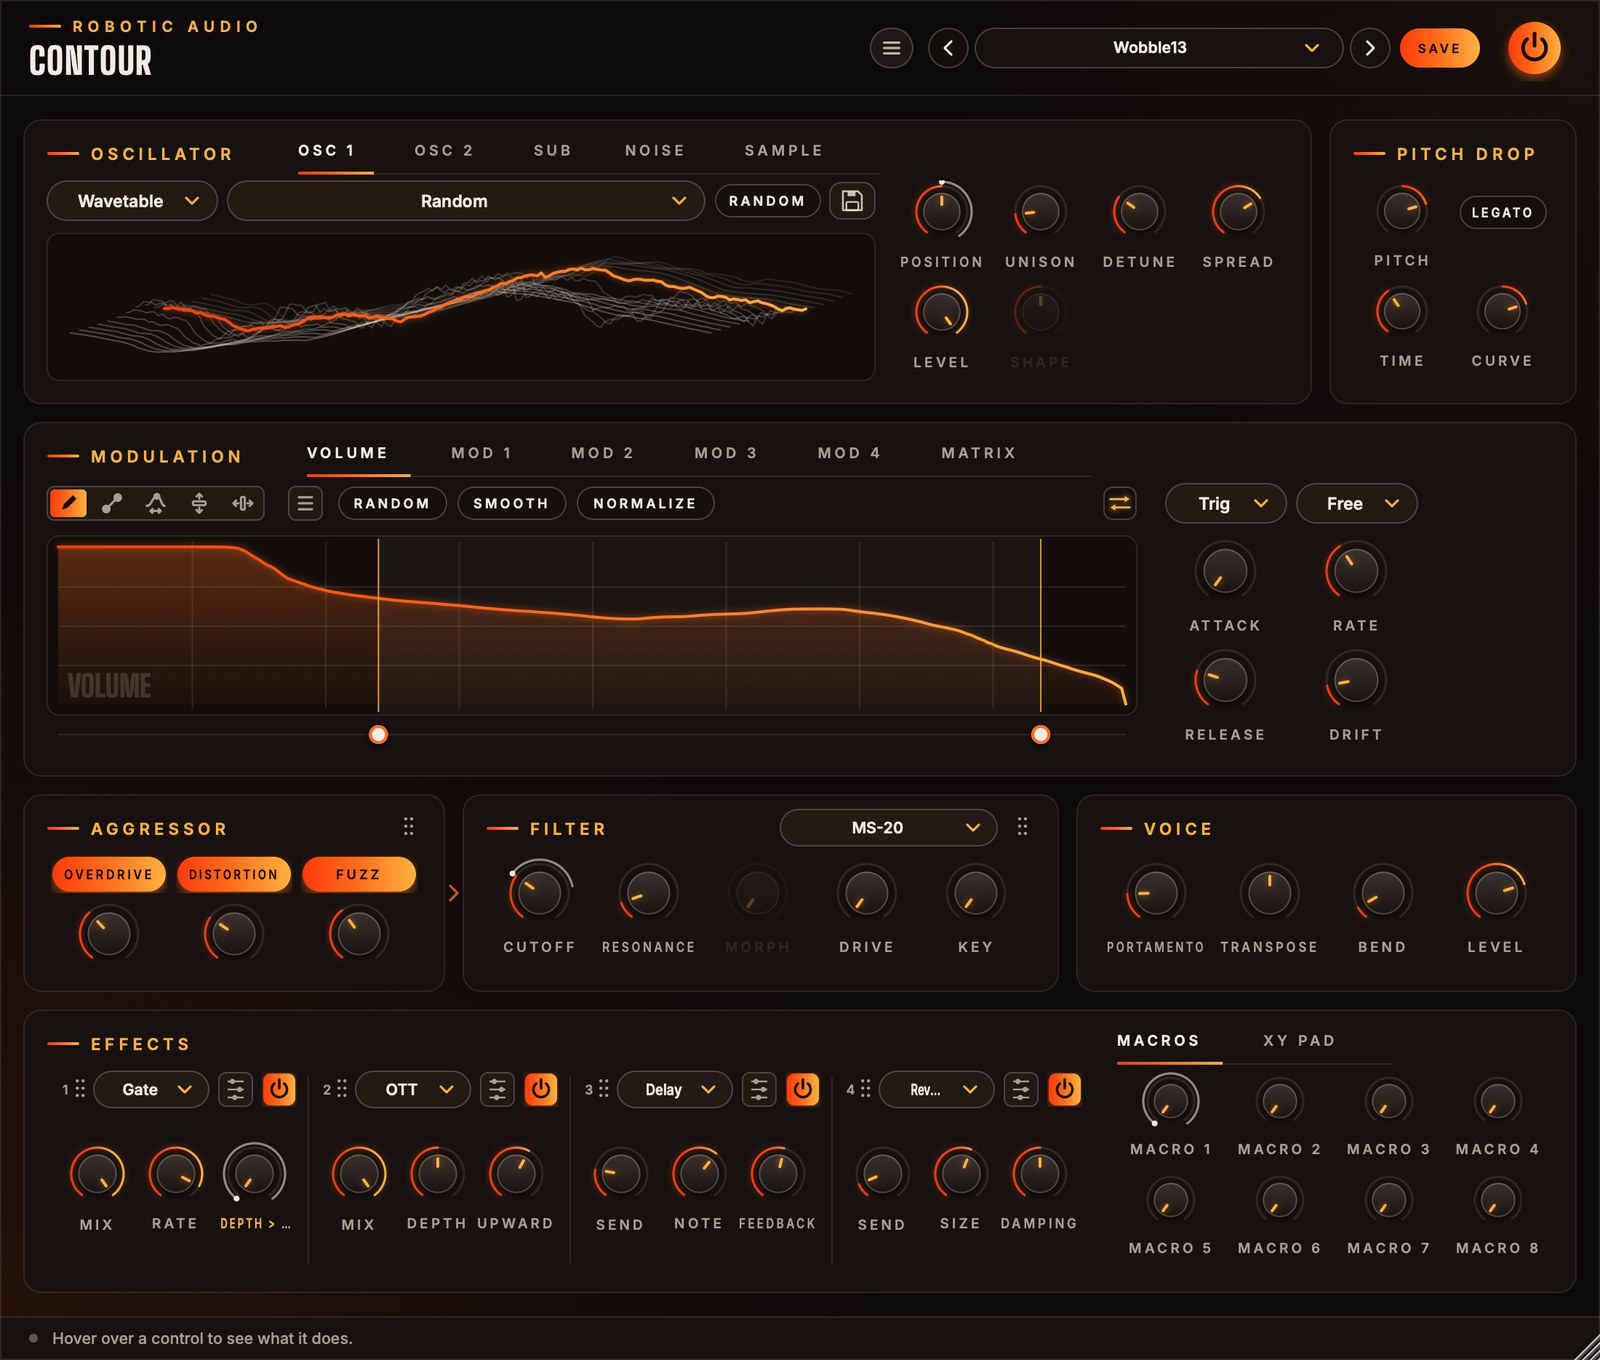
Six areas, top to bottom, roughly in the order the sound flows.
- Header
- The preset bar (previous, next, the list, SAVE), the power button (bypass) and the menu with this manual. Click the logo for version and credits.
- Oscillator
- Tabs Osc 1, Osc 2 and Sub: what makes the raw tone.
- Pitch Drop
- A fast pitch slide at the start of every note: the classic "dive-bomb" attack.
- Modulation
- The drawn envelopes Volume and Mod 1–4, and the Matrix that routes them (and MIDI and the macros) to almost anything.
- Aggressor · Filter · Voice
- Three drive stages, a 14-type filter, and the voice: level, transpose and portamento.
- Effects
- Four effect slots in series and, beside them, two tabs: the eight macro knobs or the XY pad.
Using the controls
| Do this | To |
|---|---|
| Drag a knob up or down | change it (the value shows while you touch it) |
| Cmd / Ctrl / Alt + drag | fine adjustment |
| Double-click a knob | reset it to its default |
| Click a lit chip (OVERDRIVE, SPRING…) | switch that part on or off |
| Right-click an effect control | map it to a macro |
| Drag a card's grip (⠿) | reorder: Aggressor and Filter, or effect slots |
A knob that something modulates shows a thin ring around it: the range the modulation can take it over, and a dot where it is right now.
Signal flow
What happens to a note, left to right.
The Aggressor's three stages run in order: Overdrive → Distortion → Fuzz, each only when its chip is lit. The filter sits after them, or before them: drag a card by its grip (the dots at its top right) past the other to swap them; the sound runs left to right, with an arrow between. Filtering first and then distorting gives the classic growl.
Oscillators
Osc 1 is the main voice. Osc 2 layers with it or modulates it. The sub holds the floor; noise and a sample add air and attack. The card's tabs switch between the five.
Osc 1
Choose the type in the first menu: Wavetable, Waveform, Phase Dist, Shaper, Harmonic, String, Formant, Supersaw or Granular. The Position knob is what each type moves (it takes the type's name for it: Amount, Drive, Morph, Decay, Vowel, Mix), so a matrix route to Osc 1 Position sweeps whichever is playing. Some types have a second control, the Shape knob (Tone, Size); it is greyed out for the others.
A cosine whose phase runs unevenly through the cycle (as in Casio's CZ synths). Amount bends it into the chosen shape: Saw, Square, Pulse, or Res Saw / Triangle / Trapezoid, a sine up to 16× the pitch under a window: a resonant-filter sweep without a filter. Clean, vocal, perfect for "yoi" wobbles. The display shows the wave as it plays.
A sine run through a curve you draw, with the same tools as the envelopes: left to right is the sine from −1 to +1, up and down what comes out. Drive sets how much of the curve the sine sweeps: low, just the middle (soft); high, all of it. Folds, steps and kinks all become harmonics; sweep Drive with Mod 1 and the curve is the wobble. It starts as a gentle wavefolder.
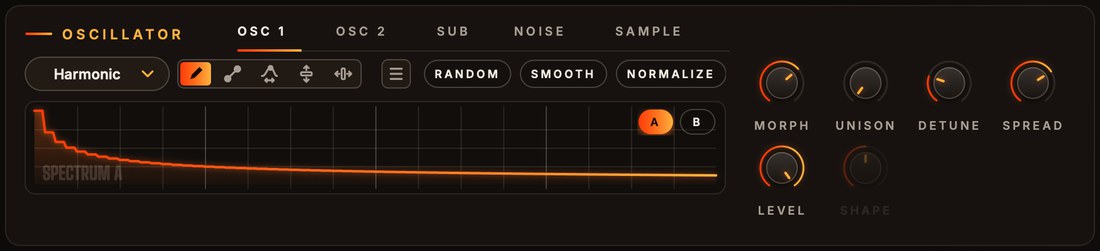
Additive: draw the levels of the first 64 partials, the fundamental at the left (the higher you draw, the louder; quiet partials have plenty of room). There are two spectra, A and B (the buttons in the drawing's corner); Morph blends from one to the other. It starts as a saw (A) and a hollow, odd-partials tone (B). Both oscillators play the same two spectra, each with its own Morph.
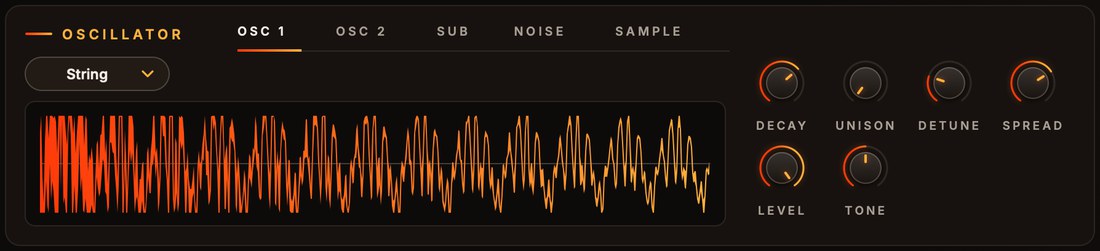
A plucked string: every note strikes it with a burst of noise that rings round a tuned delay. Decay is how long it rings, from a short thud to many seconds; at the top it never dies away, so the volume envelope alone shapes it. Tone is how bright it is. Through the drive it becomes a snarling, clanging bass.
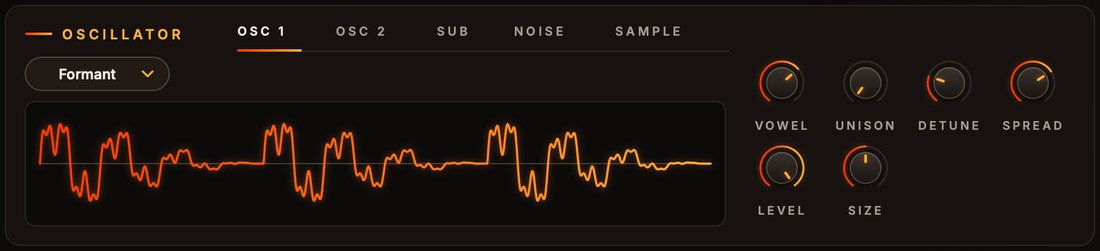
A voice: a pulse that restarts three vowel formants on every cycle. Vowel morphs through A, E, I, O and U; Size makes the voice bigger and darker or smaller and brighter. Route an envelope to Osc 1 Position and it talks, with no filter needed.
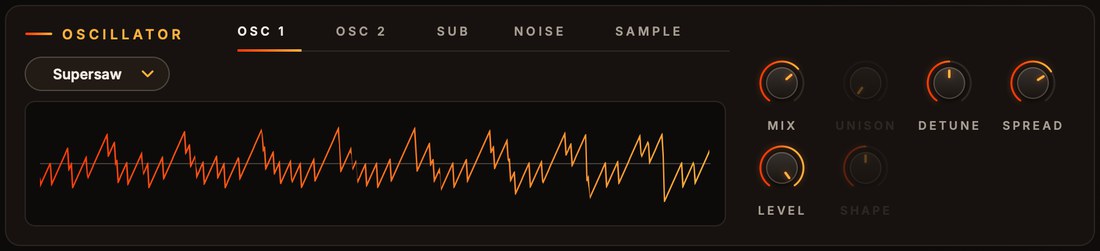
Seven saws with the classic uneven detuning. Mix goes from one saw to the six round it at full strength; Detune opens them from a gentle chorus to the wall. Always seven copies (Unison is greyed out); Spread sets their width.
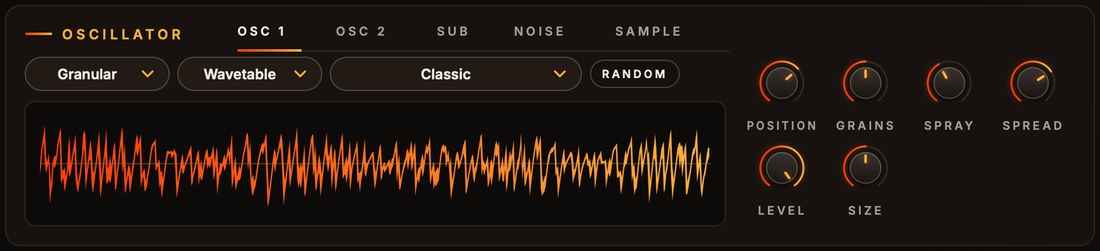
Short overlapping grains of the oscillator's wavetable, or of the sample on the Sample tab (the second menu). Position is where they are taken from, Spray (the Detune knob) how far from it each may land, Grains (Unison) how many play at once and Size how long each is, from 10 ms (buzzy) to a third of a second (smooth). A sample plays at its own pitch on C1 and follows the note from there.
The newer types show a preview: a moment of the oscillator as it is set now, redrawn as you turn its knobs.
- Wavetable
- Which table to play: built-ins (Classic, Pulse Width, Harmonic Build, Vowels, Hard Sync, Wavefold, Growl, Crush), the tables shipped with Contour, your saved ones (Yours) and Random. The 3D view shows its frames, the playing one lit.
- Wave
- In Waveform mode: Sine, Triangle, Saw, Square or Random, a random single-cycle wave.
- Random
- Rolls a new random table (3–5 random waves morphing into each other) or, in Waveform mode, a new random wave. Kept with the session and in presets.
- Save (disk)
- Saves the playing table as a WAV in your wavetable folder; it appears under Yours. Osc 2 has the same button: its table joins Osc 1's list.
- Position
- Where in the table to play, first frame to last. Sweep it with Mod 1 in the matrix for moving tones. 0–100 %
- Unison
- Copies of the oscillator playing together, detuned and spread. 1–7
- Detune
- How far apart the copies are tuned, up to half a semitone either way. 0–100 %
- Spread
- How wide the copies sit in the stereo field (also Osc 2's). 0–100 %
- Level
- Osc 1's level in the mix. 0–100 %
- Shape
- The second control of String (Tone), Formant (Size) and Granular (grain Size); a matrix destination too. 0–100 %
Osc 2
Switch it on with its power button. It has the same types as Osc 1 with its own table, wave, phase-distortion shape or shaper curve, its own Position and Shape, unison and detune (Harmonic plays the same two drawn spectra as Osc 1, with its own Morph), plus a pitch and a mode:
Simply mixed with Osc 1. Detune it a few cents or put it a fifth up for thickness.
Osc 2 moves Osc 1's phase: growls, metallic barks, talking tones. Amount is the depth.
Osc 1 times Osc 2: bells, clangs, robot voices. Amount blends it in.
Osc 2 restarts with every cycle of Osc 1; Amount raises its pitch up to three octaves: the sync scream.
- Octave · Semi · Fine
- Osc 2's pitch against Osc 1. ±3 oct · ±12 st · ±100 ct
- Amount
- What the mode does: FM depth, ring blend or sync's pitch rise. Sweep it with the matrix. 0–100 %
- Level
- Osc 2 in the mix. In FM, Ring and Sync, turn it down to hear only its effect on Osc 1.
Sub
- Wave
- Sine (pure), Triangle (a little brighter) or Square (hollow, punchy).
- Octave
- One or two octaves under the note.
- Direct
- On (default): the sub skips the drive stages and the filter, so it stays clean however gnarly the rest gets.
- Level
- The sub's level. 0–100 %
Noise
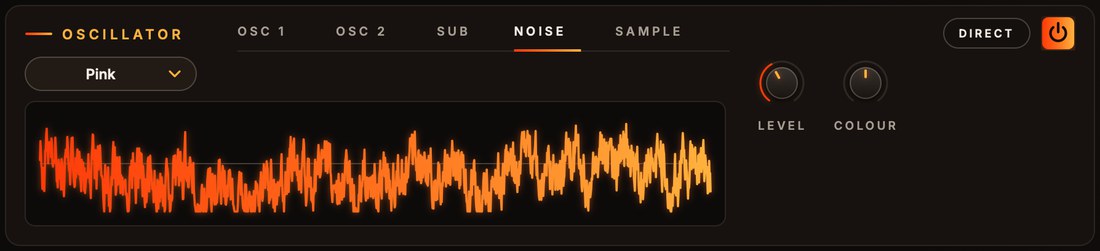
Switch it on with its power button. It follows the volume envelope like the oscillators and, unless Direct is lit, runs through the drive and the filter with them: noise into the drive for grit, through the filter for sweeps.
- Type
- White (bright hiss), Pink (even, softer), Brown (a low rumble) or Digital: a random value held 16 times per cycle of the note, so the noise has a lo-fi pitch that follows what you play.
- Colour
- Below 0 a low-pass darkens it, above 0 a high-pass thins it; 0 leaves it as it is. ±100 %
- Level
- The noise's level. Route an envelope to Noise Level in the matrix for a burst on each note. 0–100 %
- Direct
- The noise skips the drive stages and the filter.
Sample
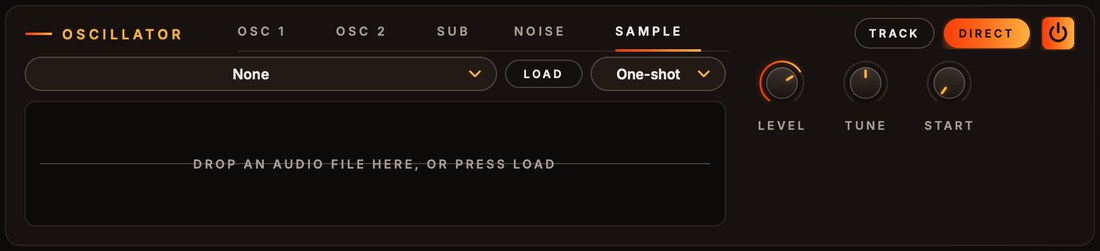
An audio file played on every note: a click or a kick for the attack, or a tone pitched across the keyboard. Load a file (WAV, AIFF, FLAC, OGG or MP3, up to half a minute) or drop one on the display; it is copied into your Samples folder next to Contour's presets, so sessions and presets find it again, and the menu lists everything in that folder. The display shows the whole sample and a line where it plays. If a preset's sample is missing on another computer, the menu says so and the rest of the preset still plays.
- Mode
- One-shot plays it once per note; Loop goes round for as long as the note sounds.
- Track
- Off (default): the sample plays at its own pitch whatever the note: for clicks, kicks and noises. On: it follows the note (glide and bends included), at its own pitch on C1.
- Direct
- On (default): the sample skips the drive stages and the filter, so a transient stays clean.
- Level
- The sample's level, a matrix destination. 0–100 %
- Tune
- Moves its pitch (and speed). ±24 st
- Start
- Where in the sample each note starts. 0–100 %
Pitch drop
Every note starts somewhere else and slides home.
- Pitch
- Where each note starts, in semitones from its own pitch: up for a drop, down for a rise, 0 for off. ±48 st
- Time
- How long the slide takes. 1 ms – 2 s
- Legato
- Lit: only a note after silence drops; notes played while another is held go straight (or slide with Portamento). Off: every note drops.
- Curve
- The slide's shape: above 0 it falls fast and settles (punchy), 0 is a straight line, below 0 it hangs on and then falls. ±100 %
Drawn envelopes
The heart of Contour: shapes you draw, played on every note.
The Modulation card has five envelopes, each a drawing you make with the mouse:
How loud the note is over time. Always on. The wobble lives here.
Free envelopes for the matrix: route them to the pitch, the filter, the wavetable position, the drive… Mod 1 starts routed to Pitch (±12 st), Mod 2 to Osc 1 Position.
Mod 1–4 have a power button (off: not calculated, nothing into the matrix) and a Bipolar switch. Bipolar, the drawing goes up and down from a centre line and sends −100 to +100 % into the matrix: right for a pitch bend up and down (Mod 1 starts bipolar). Off, it runs from the bottom, 0 to 100 %.
How an envelope plays
When a note starts, the envelope fades in over Attack and plays the drawing from the left. While you hold the key, the part between the two loop handles (the dots under the drawing) repeats. When you let go it fades out over Release, still following the shape.
- Loop
- The button with the arrow picture. Click to step through, right-click to choose: Off (play once, hold the end), Forward, Backward, Palindrome (back and forth).
- Trigger
- Trig: restart on every note. Legato: only after silence, so overlapping notes keep it running. Tempo: never restarts; it follows the song like an LFO (the whole drawing is one cycle) and notes only fade it in and out.
- Sync
- Free: speed set by Rate. Note, Dotted, Triplet: Rate becomes a note value: the whole drawing lasts that long at the song's tempo (120 BPM without a host), and a beat grid appears.
- Rate
- In Free sync: how fast the shape plays. At 1x the whole drawing takes 2 seconds. 0.1–10x
- Rate (synced)
- When synced: how long the whole drawing lasts, as a note value. Clockwise is shorter, so faster. 8/1 – 1/64
- Attack
- How long a note takes to fade into the envelope. Right-click it to disable it: the envelope starts at full level at once (the knob dims and reads Attack Off). 1 ms – 5 s
- Release
- How long it fades out after the key is let go. Right-click it to disable it: the envelope then holds the value it had when you let go (the knob reads Release Off) until the next note. On the Volume envelope the note keeps sounding at that level. 5 ms – 5 s
- Drift
- A smooth random wobble on the output, so no two passes sound quite alike. It never touches the timing: synced envelopes stay in time. Right-click it to disable it (the knob keeps its setting and reads Drift Off). 0–100 %
Drawing & editing
Five tools, edit regions, undo, copy and paste between envelopes.
Tools
- Draw
- Freehand: drag across the shape.
- Line
- Drag a straight line (its ends snap to the grid when synced; hold Cmd for free). Then drag its end dots to move them, or the ring to curve it: up or down for how much, sideways for where the bend sits. Hold Cmd on the ring for an S-curve.
- Warp
- Grab the shape and drag. Sideways moves that moment earlier or later, stretching the rest; up and down bends the shape smoothly around it.
- Lift
- Drag up or down to raise or lower the edit region (or the whole shape).
- Move
- Drag sideways to slide the edit region along, in grid steps when synced. Without a region it shifts the whole shape round, like a phase shift.
Buttons
- Random
- A new random pattern on the beat grid (16 steps when not synced). Click again for another. The menu has more generators: Rhythm, Melody, Organic and Wobble.
- Smooth
- Softens corners and steps. Click again to smooth more.
- Normalize
- Stretches the shape to the full range.
- Menu (≡)
- Undo and redo, copy and paste, zoom, edits (Smooth, Normalize, Flip, Reverse), random generators, Waveforms (sine, triangle, saws, square, exponentials: 1–8 cycles or one per grid step), Windows (the smooth bumps of grain and analysis windows: Hann, Hamming, Blackman, Gauss, Tukey, Kaiser, Expodec and more, one to eight or one per grid step) and ready-made shapes by category, Percussion first: single drum hits (Punch, Snap, 808 Decay, Gated, Clap, Flam), rolls, Bouncing Ball, reverses and sweeps. Right-click the drawing for the same menu.
Edit regions
Shift-drag across the drawing to mark a region. Drawing, edits, Random and shapes then only change that part.
| Handle | Does |
|---|---|
| Upper edge handle | stretches what's inside |
| Round edge handle | repeats the content into the space it's pulled over |
| Top and bottom handles | compress or expand it vertically |
| Small taper handles | fade the amplitude in or out from one end |
| Dots on the curve at the edges | move the start or end value, tilting the content between |
| Edges with Shift held | resize the region itself |
Cmd+C / Cmd+V copy and paste a region, or the whole shape, into any envelope. Shift-click or Esc clears the region.
Zoom
Cmd+scroll or pinch to zoom around the mouse, scroll to pan, Cmd+= / Cmd+- to zoom and Cmd+0 to see it all. The bar along the top shows (and drags) the view.
Modulation matrix
Eight slots: anything moves anything.
Open the Matrix tab in the Modulation card. Each slot is one row: Source × Amount (× Via) + Offset → Destination, optionally smoothed. Click a cell for its menu; drag the Amount, Offset or Smooth cells up and down (Cmd: fine), double-click to reset.
- Source
- Envelopes: Volume, Mod 1–4. MIDI: Velocity, Note (key tracking, centred on C4), Mod Wheel, Aftertouch, Pitch Bend, CC A, CC B and Random (a new value on every note). XY Pad: X and Y. Macros 1–8.
- Via
- A second source that scales the slot, e.g. the mod wheel bringing in an envelope. None: always on.
- Destination
- Osc 1 Position, Detune, Spread, Level, Shape; Osc 2 Position, Level, Pitch, Mod Amount, Shape; Sub Level; Noise Level, Colour; Sample Level; Pitch, Level, Pitch Drop, Portamento; Overdrive, Distortion, Fuzz; Filter Cutoff, Resonance, Morph, Drive; Macros 1–8.
- Amount
- How far, either way: 100 % moves the destination across its whole range. Pitch destinations show it in semitones (100 % = 24 st). ±100 %
- Offset
- A fixed shift added to the slot, in the same units as the amount (a pitch: semitones). It works with no source too, e.g. Osc 2 Pitch +7 st for a fifth. ±100 %
- Smooth
- Glides the slot's output over this time, softening steps and jumps: a stepped shape turns into slides, a MIDI CC stops zippering. − is none (and costs nothing). 0–2000 ms
CC A and CC B learn from your controller: click Learn under the matrix, then move a knob.
Aggressor
Three drive stages, from warm to wrecked.
- Overdrive
- Warm, slightly asymmetric saturation. up to 30 dB
- Distortion
- A harder clip, for bite. up to 36 dB
- Fuzz
- A biased hard clip, splatty and gated: the gnarliest of the three. up to 48 dB
Click a chip to switch its stage on; the knob below sets how hard. Stages can be combined: they run in the order shown.
Filter
Fourteen characters. The knobs' names follow the type.
Moog-style ladder, 24 or 12 dB: fat, warm, the classic.
Clean state-variable filter; Morph blends low-pass → band-pass → high-pass.
303-style squelch.
Saturating, screaming resonance.
Vowels A–E–I–O–U on the Vowel knob: talking basses.
Tuned metallic or hollow; the cutoff is its pitch.
Sweepable notches.
- Cutoff
- The filter's frequency (comb: its pitch; formant: tone; phaser: centre). 20 Hz – 20 kHz
- Resonance
- A peak at the cutoff; high values sing and squelch (comb: feedback; formant: focus).
- Morph
- SVF: mode. Formant: vowel. Comb: damping. Phaser: spread.
- Drive
- Pushes the signal into the filter: grit and a fatter resonance.
- Key
- How much the cutoff follows the note, from C4. At 100 % it moves an octave per octave, so the tone stays the same up the keyboard.
- Order
- The Aggressor and Filter cards run left to right. Drag one by its grip (the dots at the top right) past the other to swap them: filter first, then distort, for the classic growl; or drive first for a smoother sound.
Voice
How notes connect, and how loud.
- Level
- The output level. −48 – 0 dB
- Transpose
- Moves every note up or down in semitones. Everything follows it: the pitch drop, portamento, pitch modulation and the filter's key tracking. Changing it while a note plays slides there at the Portamento speed. ±24 st
- Bend
- How far the pitch wheel bends the note, up and down. Set it to 0 to use the wheel only through the matrix. 0–24 st
- Portamento
- How long the pitch slides from one note to the next, whether the notes overlap or not (only the very first note starts right on its pitch). 0: no slide. 0 – 2 s
XY pad
Beside the effect slots, switch the Macros tab to XY Pad.
- XY Pad
- Drag the dot to play two modulation sources at once, XY X (left to right) and XY Y (bottom to top), both −100 to +100 % with 0 in the middle. Route them in the Matrix; the pad's corners show where they go. Behind the dot runs a picture of the output's last two seconds, so you see what your moves do. Double-click to centre it. Both are automatable.
- Spring
- Lit (default): the dot glides back to the centre when you let go, like a joystick. Off: it stays where you leave it.
Contour is monophonic: one note at a time, the last one wins, and each new note restarts the envelopes (unless their trigger is Legato or Tempo).
Effects
Four slots in series, fourteen effects, each with its own editor.
Each slot has a menu (which effect), a power button, a Mix or Send knob and its two most useful controls. The slots run left to right; drag a slot by its number and dots to move it, and all its settings come along.
- Mix
- Crossfades the dry sound and the effect.
- Send
- On Reverb, Reverb 2 and Delay: the dry sound always passes at full level and Send adds the effect on top, nice to automate.
- Edit (sliders icon)
- Opens the effect's own editor over the envelopes, with a live display and every control. Click again (or CLOSE) to close it.
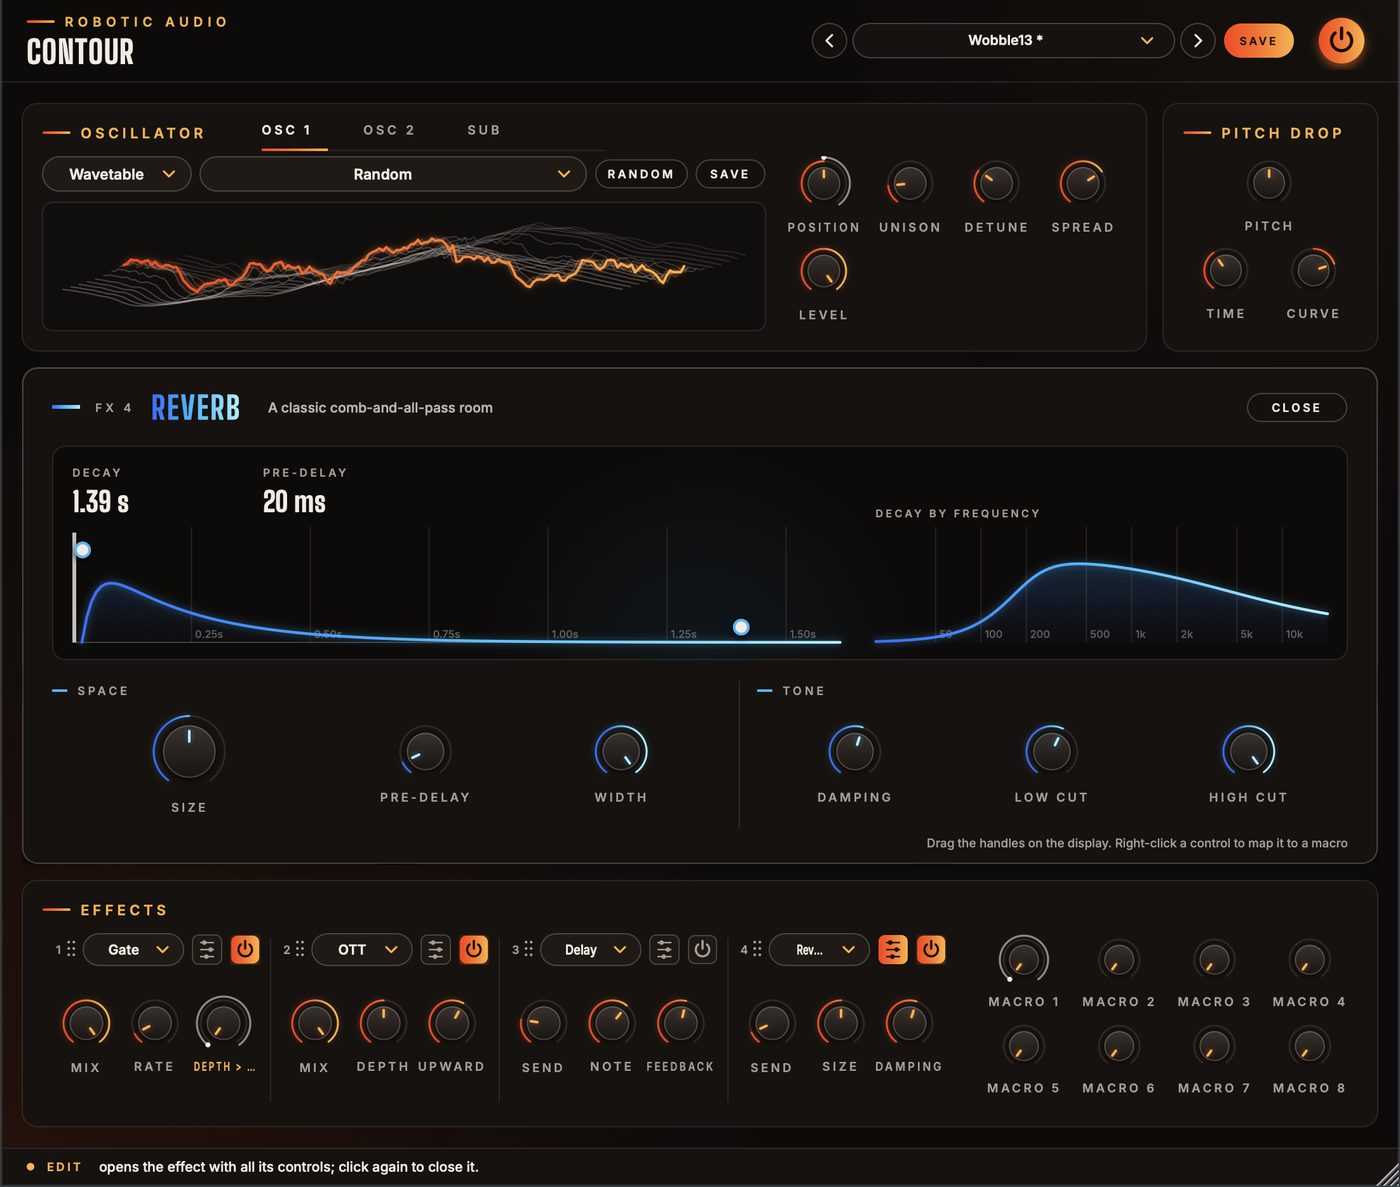
In the editors
The display shows what the effect does, live. Most have handles: drag them to change the effect directly, double-click one to reset it, and use the scroll wheel on it for a second setting (EQ's Q, the compressor's ratio, the filter's morph…).
OTT
Three-band upward and downward compression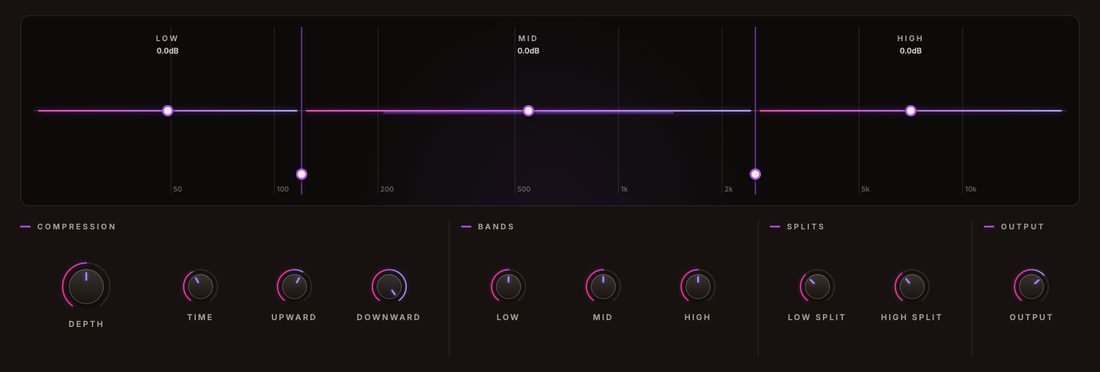
Splits the sound into low, mid and high bands and pushes each one down above a threshold and up below another: everything gets louder, denser and brighter. Depth sets how hard, Time how fast, Upward/Downward each direction; the bands' levels and split points are on the display.
Distortion
Six flavours of drive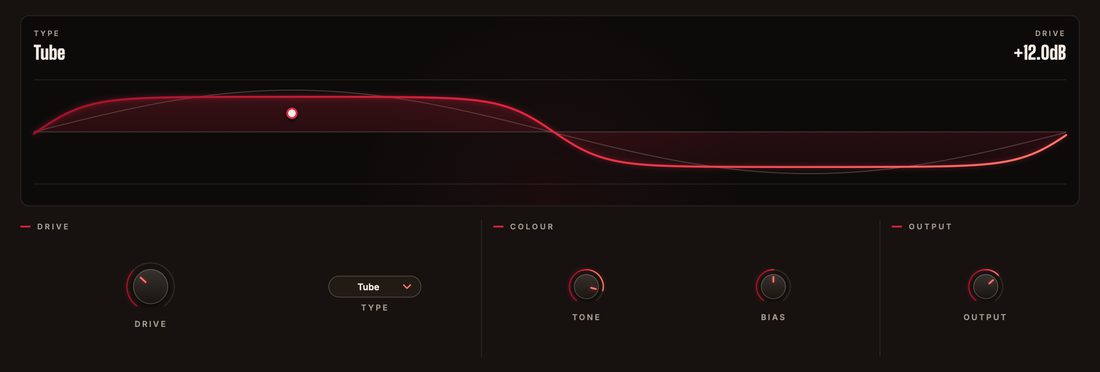
Tube (warm), Fold (wavefolder), Rectify (an octave up), Crush (fewer bits), Downsample and Hard Clip. The display runs a sine through it so you see exactly what it does. Tone tames the fizz, Bias adds uneven, buzzy harmonics.
EQ
Shelves, a bell and two cuts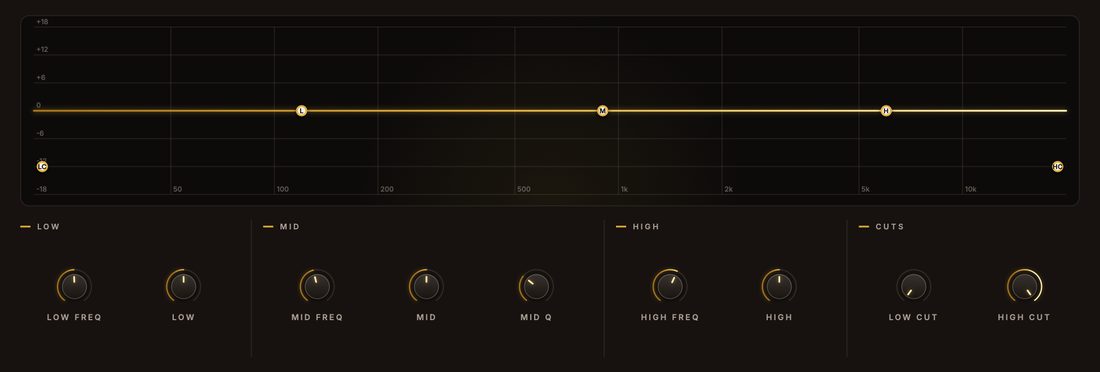
Low and high shelves, a bell with adjustable Q, a low cut and a high cut. Drag the numbered nodes; the wheel on the M node sets its width.
Compressor
A clean, fast peak compressor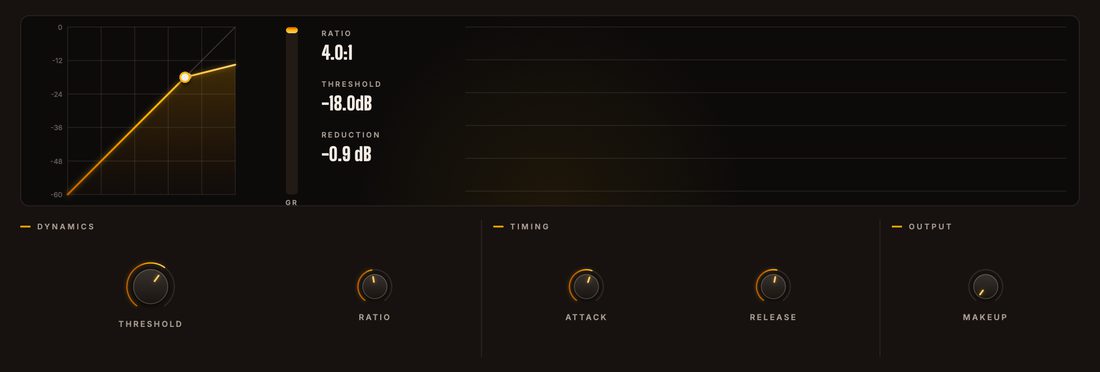
The curve shows input against output level, with a dot where the signal is right now, a gain-reduction meter and a scrolling history. Drag the knee for the threshold, use the wheel on it for the ratio.
Delay
Tempo-synced echoes with tape wobble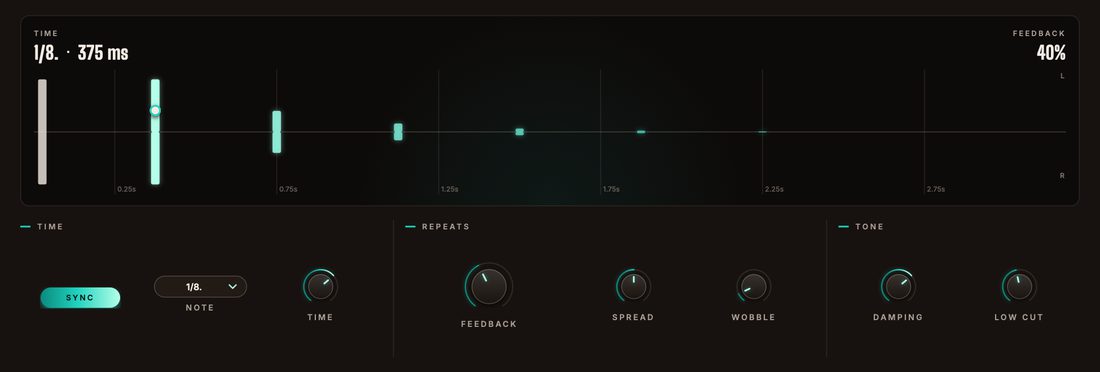
Each repeat is a bar: left above the line, right below, fading with the feedback and darkening with the damping. Drag the first repeat: sideways for the time (it snaps to note values when synced), up and down for the feedback. Spread delays one side for width, Wobble adds tape drift.
Reverb
A classic comb-and-all-pass room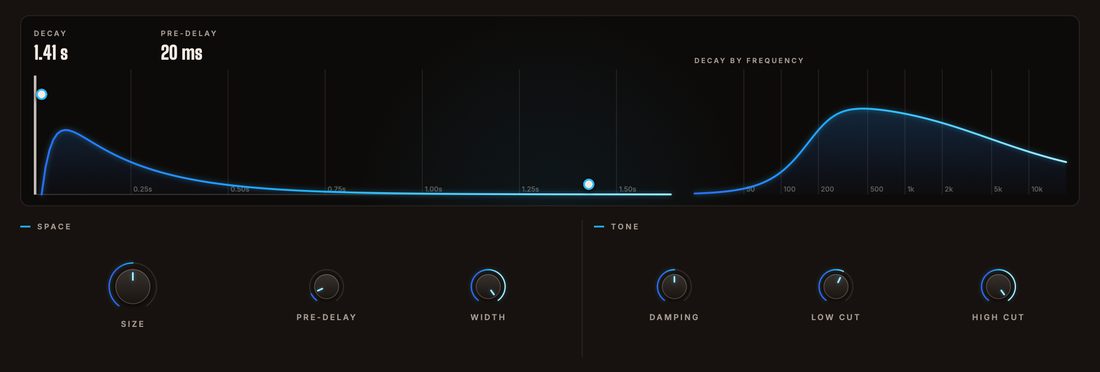
The display shows the tail over time and how long each frequency rings. Size sets the feedback (a longer tail), Damping darkens it as it decays, Low Cut keeps the bass out, High Cut darkens the output.
Reverb 2
A dense, modulated feedback delay network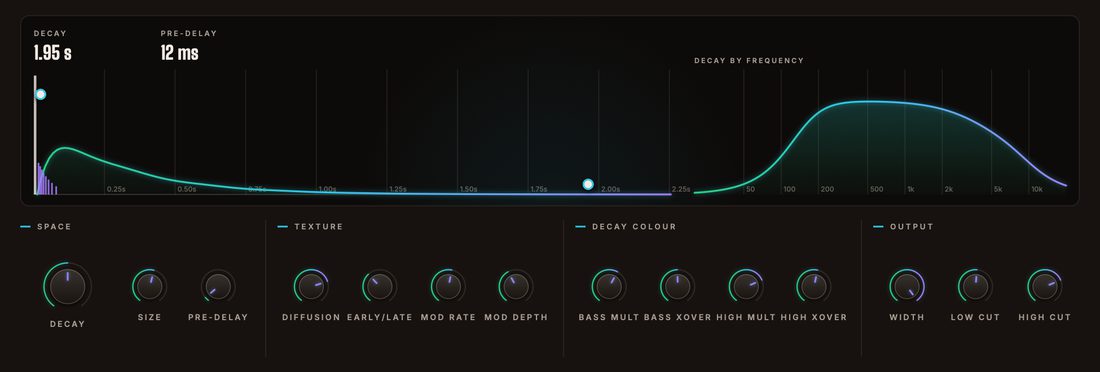
Decay in seconds, size, pre-delay, diffusion and early reflections, the lows and highs decaying at their own rates (Bass Mult, High Mult and their crossovers), gentle modulation against metallic ringing, width and output cuts. Drag the tail's end for the decay and the top handle for the pre-delay.
Chorus · Flanger · Phaser
Movement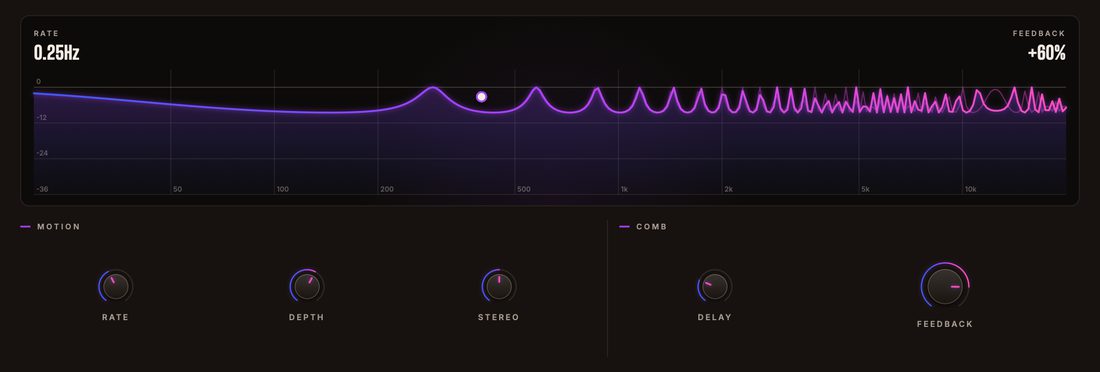
Chorus: drifting copies for width and lushness. Flanger: a swept comb filter, metallic (+ feedback) or hollow (−). Phaser: sweeping notches from 2–12 all-pass stages. Their displays move with the effect's own LFO.
Width · Pitch · Filter · Gate
Utilities with attitude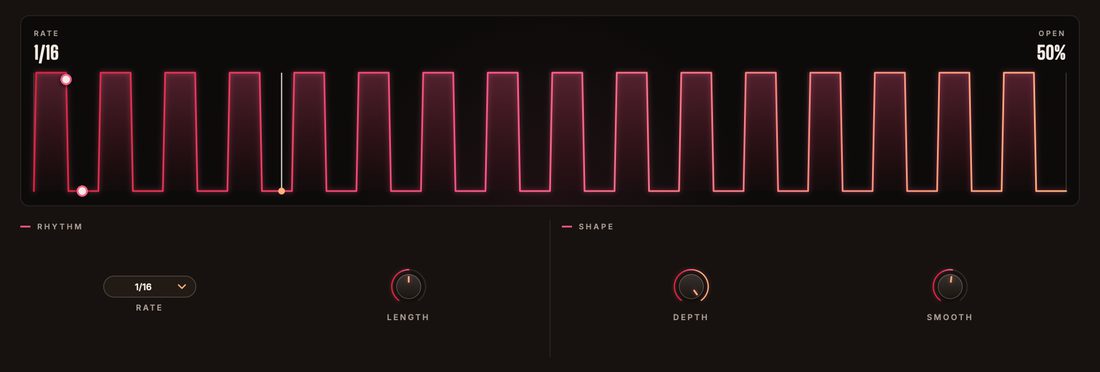
Width: from mono to extra wide, the low end kept mono below a frequency, plus a Haas delay. Pitch: granular shifting two octaves either way, with fine tune and stereo spread. Filter: any of the fourteen filter types as an effect. Gate: a tempo-synced trance gate following the song.
Macros
Eight knobs that can move many things at once.
Right-click any control in an effect and choose a macro to map it. Mapped, the control shows its range as a ring (or a line): drag it to set where the range starts and Shift-drag to set where it ends. One macro can drive any number of controls, each over its own range.
Macros are automatable in your DAW, can be routed to and from the matrix, and can be renamed: right-click a macro knob.
Presets
Everything is saved: knobs, drawings, random tables, effects and macros.
Use the arrows to step through presets or click the name for the list. SAVE stores your sound as a user preset; the menu also has Save As, Delete and Open Folder. A * after the name means you've changed something since loading it.
User presets are XML files in ~/Library/Audio/Presets/Robotic Audio/Contour (macOS) or Documents/Presets/Robotic Audio/Contour (Windows): easy to back up and share. Saved wavetables are in a Wavetables folder beside them.
Shortcuts
On Windows and Linux, read Ctrl for Cmd.
| Keys | Where | Does |
|---|---|---|
| Cmd + drag | Knobs | fine adjustment |
| Double-click | Knobs, display handles | reset to default |
| Shift + drag | Envelope | mark an edit region |
| Shift + click, Esc | Envelope | clear the region |
| Cmd Z · Cmd Shift Z | Envelope | undo · redo (100 steps) |
| Cmd C · Cmd V | Envelope | copy · paste, also between envelopes |
| Cmd = · Cmd - · Cmd 0 | Envelope | zoom in · out · show all |
| Cmd + scroll, pinch | Envelope | zoom around the mouse |
| Cmd while drawing a line | Envelope | ignore the grid |
| Cmd on a line's ring | Envelope | S-curve |
| Shift + drag | Mapped effect control | set the end of its macro range |
| Scroll wheel | Display handles | a second setting (Q, ratio, morph…) |
| Double-click | XY pad | centre the dot |
Sound recipes
Starting points; then draw your own.
Volume: a held shape. Mod 1: a sine (Menu → Waveforms → 1 cycle), Sync Note 1/4, Trigger Tempo. Matrix: Mod 1 → Cutoff +70 %. Filter: Ladder LP 24, resonance 40 %. Overdrive on.
Filter: Formant. Mod 1 → Filter Morph +100 % with a slow, wandering shape. Osc 2 in FM at 30 %. Drift 20 % on Mod 1.
Pitch Drop +36 st, Time 60 ms, Curve 70 %. Volume: short decay, loop Off. Distortion: Fold. Reverb 2 send 25 %.
Osc 1 saw, Unison 5, Detune 35 %. Osc 2 Layer saw, Fine +12 ct. Sub on, sine, −1 oct, Direct. Chorus and Width 140 % after.
Volume: Random (Menu → Random → Rhythm) synced to 1/1. Effects: Gate 1/16 at 70 % depth, OTT at 60 %.
Osc 1: Formant, Size 40 %. Mod 2: a slow wandering shape, Matrix: Mod 2 → Osc 1 Position +100 %. Overdrive on, Sub on.
Osc 1: String, Decay 100 %, Tone 70 %. Fuzz on at 30 %. Filter: Comb +, Key 100 %. The volume envelope does the rest.
Sample: a kick, One-shot, Direct. Osc 1 a saw through the Aggressor. Volume: Attack 20 ms, so the kick speaks first.
Osc 2 Sync, Level 0 %. Matrix: Mod 2 → Osc 2 Mod Amount +80 % with a rising ramp. Filter: MS-20, resonance 60 %.